Launch Pad Build Guide
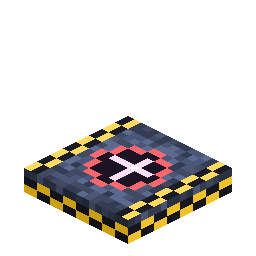
A step-by-step walkthrough for building a launch pad for every rocket tier, from a single block for your first flight to the Heavy Launch Complex. For the full block reference see Rocket Launch Pad and Launch Gantry.
At a glance
Each rocket tier needs a bigger pad. A bigger pad always works for a smaller rocket.
| Pad tier | What to build | Launches | Unlocks |
|---|---|---|---|
| 1 | One Launch Pad block | Tier 1 rockets | The Orbital Station |
| 2 | A full 3×3 of Launch Pads | Tier 1–2 rockets, Cargo Rockets | Greenxertz |
| 3 | A 3×3 of Launch Pads, ringed with 16 Station Walls | Tier 1–3 rockets | Cindara |
| 4 | A 5×5 of Launch Pads plus a Launch Gantry (the Heavy Launch Complex) | Every rocket | Glacira |
- Craft the parts for the tier you want.
- Lay them out on flat ground, all at the same height.
- Right-click a pad block with an empty hand to check which tier it reads as.
- Right-click the pad with your rocket to deploy it, then fuel up.
1. Craft the parts
| Part | Recipe | Makes |
|---|---|---|
| Rocket Launch Pad | 8 Nerosteel Ingots around a Block of Nerosium | 1 |
| Block of Nerosium | 9 Nerosium Ingots | 1 |
| Station Wall | 8 Nerosteel Ingots around an Iron Ingot | 8 |
| Launch Gantry | 6 Nerosteel Ingots, Iron Bars and a Station Wall (see its page) | 1 |
What each tier costs, from scratch:
| Pad tier | Blocks | Nerosteel Ingots | Nerosium Ingots | Other |
|---|---|---|---|---|
| 1 | 1 pad | 8 | 9 | — |
| 2 | 9 pads | 72 | 81 | — |
| 3 | 9 pads + 16 Station Walls | 88 | 81 | 2 Iron Ingots |
| 4 | 25 pads + 1 Launch Gantry | 214 | 225 | 1 Iron Ingot, 1 Iron Bars |
Tip: every tier reuses the one before it. Going from Tier 2 to Tier 3 only costs the 16 walls, and when you upgrade to Tier 4 you can pick those walls back up (one of them goes into the gantry).
2. Pick the spot
- Flat and level. Pad blocks only join up when they sit side by side at the same height. Blocks touching only at a corner, or one block higher, don't count.
- Keep it separate. Every pad block touching another becomes one pad, and one pad holds one rocket. Leave at least a one-block gap between pads you want to use for different rockets.
- Room to breathe. You can breathe within about 6 blocks of a launch pad, so arrivals don't suffocate on landing. Anything further out needs an Oxygen Generator base.
- On the Orbital Station a 3×3 pad is already built for you.
3. Build your tier
Key for the plans below (seen from above): P = Launch Pad, W = Station Wall, G = Launch Gantry,
F = Fuel Tank (optional), . = anything.
Tier 1: one block
PPlace one Launch Pad. That is enough for a Tier 1 rocket and your first trip to the Orbital Station.
Tier 2: a full 3×3
P P P
P P P
P P P
All nine blocks, no gaps. Extra pad blocks attached to the side are fine, as long as a complete 3×3 square is in there.
Tier 3: a 3×3 ringed with Station Wall
W W W W W
W P P P W
W P P P W
W P P P W
W W W W W
Surround the 3×3 with 16 Station Walls at the same height as the pads, corners included. Every one of the 16 must be a Station Wall: a single gap or a different block and the pad drops back to Tier 2.
The wall ring leaves no room beside the pads, so a Fuel Tank can't sit next to a Tier 3 pad. Fuel it from below instead (see Fuel it).
Tier 4: the Heavy Launch Complex
. . . G . . .
. P P P P P .
. P P P P P .
. P P P P P .
. P P P P P .
. P P P P P .
. . . F . . .
A complete 5×5 of Launch Pads, plus at least one Launch Gantry right next to the square at pad level. No Station Walls are needed.
- Put the gantry in the middle of a side, touching a pad block. A gantry on a corner still forms the complex, but it isn't touching any pad, so right-clicking it won't board the rocket.
- Upgrading from Tier 3: take down the 16 walls, fill those spots with Launch Pads to make the 5×5, then add the gantry.
- A Fuel Tank on any other side of a Heavy complex pumps at the fastest rate.
4. Check it and deploy the rocket
The pad tells you when it's ready. When the block you place completes a tier (the last pad of the 3×3, the 16th Station Wall, or the gantry), a message appears above your hotbar, the pad chimes and sparkles:
✔ Launch pad ready: Tier 3 — place a rocket
There is nothing else to switch on. Once you see that message, all that's left is to place a rocket.
Right-click any pad block with an empty hand to check it at any time. Chat shows the pad's tier and size, confirms it's ready for a rocket, and says what to build next:
Launch Pad Tier 2 · 9 blocks ✔ Ready — place a rocket (up to Tier 2) Next: ring the 3x3 with 16 Station Walls for Tier 3
Don't sneak while you do this: sneaking with an empty hand on a pad you named as a travel stop removes it from the travel list.
Deploy: right-click the pad with the rocket item. The rocket stands in the centre of the 5×5 (or the 3×3, if there's no 5×5). You can deploy on any pad, even a half-built one, and finish building around the rocket. The size check only happens at launch. If the pad is too small, chat tells you the tier it reads as. Still, it's easiest to finish the pad first so the rocket lands in the centre.
5. Fuel it
| Pad | A Fuel Tank pumps |
|---|---|
| Partial pad (not a full square) | 40 mB per tick |
| Full 3×3 | 160 mB per tick (4× faster) |
| Heavy Launch Complex | 480 mB per tick (12× faster) |
- Fuel Tank: place it beside any pad block, at pad level. It pumps into whichever rocket stands on the pad.
- Universal Pipe: any pad block takes rocket fuel (fluid layer), oxygen (gas layer) and Rocket Fuel Canisters (item layer) and passes them into the docked rocket. This is the way to fuel a Tier 3 pad: run the pipe up to a pad block from underneath.
- By hand: right-click the rocket with Rocket Fuel Canisters.
A trip to another world costs 2,500 mB. Carry spare canisters so you can fly home.
The shortcut: Launch Controller
A Launch Controller builds the pad for you.
- Place the controller facing open, flat ground. It builds the pad in front of it, centred 6 blocks out, at the controller's height.
- Load Launch Pads, Station Walls and Launch Gantries into its three slots.
- Pick a tier (T1–T4). The readout shows how many of each block are still needed.
- Press Toggle Hologram to preview the layout, then Build Pad.
It builds on top of what's there, so you can upgrade a pad tier by tier without tearing it down. For Tier 4 it swaps the wall ring for pad blocks and puts the gantry in the middle of the far side. The controller also stores fuel, oxygen and power and can launch the rocket from its screen.
Troubleshooting
- "This launch pad reads as Tier X, but this is a Tier Y rocket" → the square under the rocket isn't complete. Right-click a pad with an empty hand to see what's missing. The square has to be the one the rocket is standing on, not another one elsewhere on the same pad.
- The pad reads lower than expected → check that every block is at the same height, that no pad block is missing, and that the Tier 3 ring has all 16 Station Walls, corners included.
- "Pad occupied" → the pad already has a rocket. Two pads touching each other count as one pad.
- A deployed rocket won't launch any more → a pad block, wall or gantry under it was broken. Put it back.
- The gantry won't let you board → it's on a corner. Move it to the middle of a side.
- Cargo Rockets need a Cargo Pad inside a full 3×3. The Cargo Pad counts as one of the nine pad blocks.
See also: Rocket Launch Pad, Launch Gantry, Launch Controller, Station Wall, Fuel Tank, Getting Started.