Rocket Launch Pad
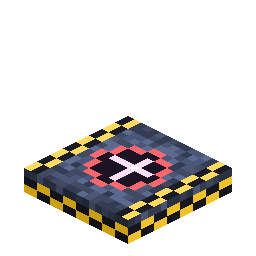
The mount a rocket is deployed onto before launch — and a safe landing zone.
Overview
Deploy a Rocket (right-click a launch pad with a rocket item) and it appears on the pad, ready to fuel and fly. The pad also acts as a small breathable safe zone so arrivals aren't immediately punished by the airless atmosphere.
Obtaining
Craft (shaped):
N N N
N B N
N N N
N = Nerosteel Ingot · B = Block of Nerosium
How it works
-
Deploy: right-click any pad block with a rocket item to place the rocket on it. The pad size is
checked at launch. If the pad is too small for the rocket's tier, the launch is blocked with a clear message. Breaking pad blocks under a deployed rocket can ground it.
-
Pad size per tier (a bigger pad always works for a smaller rocket):
-
Tier 1 — one pad block.
-
Tier 2 — a full, aligned 3×3 pad.
-
Tier 3 — a 3×3 pad ringed with Station Wall (the 16-block border of the
surrounding 5×5, at pad level), or a Heavy Launch Complex.
-
Tier 4 — the Heavy Launch Complex only.
-
-
Rocket numbers per tier:
Tier Fuel tank Onboard oxygen Onboard power 1 3,000 mB 2,000 mB 4,000 FE 2 6,000 mB 4,000 mB 8,000 FE 3 12,000 mB 8,000 mB 16,000 FE 4 24,000 mB 16,000 mB 30,000 FE -
Fuel per launch is the same for every tier. It depends on the trip:
- a trip to another dimension costs 2,500 mB (500 base + 2,000);
- a hop inside the same dimension costs 500 mB + 60 mB per 100 blocks.
Both scale with
fuelCostMultiplier. See Configuration. -
Tip: a Tier 1 rocket reaches the station with only about 500 mB left. Carry at least
2 Rocket Fuel Canisters so you can fly home.
-
Heavy Launch Complex: a complete, aligned 5×5 pad plus at least one
Launch Gantry module adjacent at pad level. Right-click the gantry to board the rocket; empty-hand right-click any pad block for a formation report (cluster size, largest square, modules present, next missing piece). See Launch Gantry.
-
Multiblock: pads placed adjacently form a cluster. A full, aligned 3×3 pad lets a
Fuel Tank auto-fuel 4× faster — and a Heavy complex 12× faster (480 mB/t).
-
Automation proxy: while a rocket stands on the cluster, every pad block exposes the rocket's
fuel-intake slot as an item capability — point a hopper or a Universal Pipe (item layer) at any pad block to feed in Rocket Fuel Buckets/Canisters (and pull out the empty buckets). A Fuel Tank + pipes on a 3×3 pad fully automates launch prep.
-
Safe zone: within a few blocks of a pad you can breathe, so you won't suffocate the instant you
land. Build an Oxygen Generator base for anything beyond the landing area.
Building one? The Launch Pad Build Guide has a layout plan and material list for every tier.
Pad-to-pad travel
Launch pads double as the waypoints of rocket travel.
- Register a pad: right-click a pad with a Name Tag to commission it as a named travel node (the tag's name labels it, or "Pad N"). Registered pads become landing targets.
- Pick where you land: in the rocket UI you choose a destination (Home / a planet / the Orbital Station), then cycle a pad selector to land on a specific registered pad there — or Nearest to auto-pick. You can also hop pad-to-pad within the same dimension.
- Calculated fuel: a launch burns a base cost plus distance (for a same-world hop) or a flat cross-dimension surcharge. The cost is shown live in the console; the launch is blocked until the tank covers it.
- Return home: a rocket remembers the pad it launched from, so flying back lands you on that exact pad. A Landing Pod is only auto-built when the destination genuinely has no launch pad.
Details
- ID:
nerospace:rocket_launch_pad· Tool: pickaxe, iron tier · Drops: itself